October is scrap busters month at Sew, Mama, Sew: what a brilliant idea! People who sew tend to gather piles and piles of scraps… we are reluctant to throw away even the tiniest bit of our lovely fabrics, right? Well, it’s time to put them into use!
Today I’m going to try to show you how to make a scrappy carrier bag store (or, if you prefer, a grocery bag dispenser). Even though we’re all trying to reduce our use of plastic carrier bags, some of them manage to end up inside a dawer or under the sink… So I suggest we start storing them in a neat, handy way!
–

Materials
– fabric scraps in matching/contrasting colours
– rectangle of matching/contrasting fabric for loop (for hanging) (50 x 6 cm)
– square of muslin (approx. 45 x 45 cm)
– braided elastic, 1 cm wide (cut 2 lenghts of 15 cm)
– tailor’s chalk
– rotary cutter
– clear plastic ruler
– self-healing mat
– pins
– all-purpose thread
– sewing machine

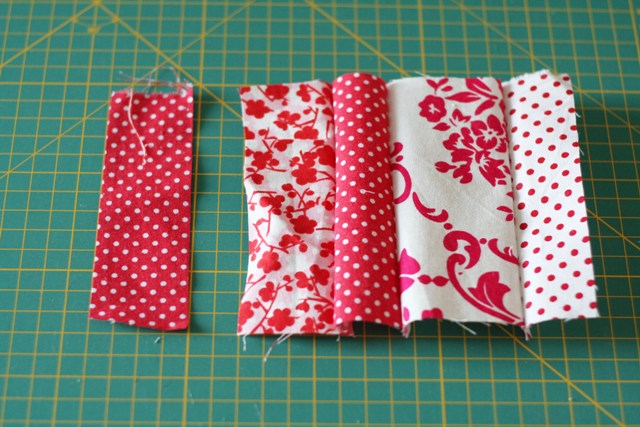
1. Select your fabric scraps. The goal is to end up with a 45 x 45 cm (approx.!) square of pieced fabric. I decided I’d construct 4 strips, each of them approx. 12 cm wide. So I cut my scraps into rectangles that were 12 cm long (all of different widths).
–

2. Piece scraps rather randomly. Aim for a total length of 45 cm (minimum), but don’t worry if it gets a little longer, as you’ll trim it later. Press.
–
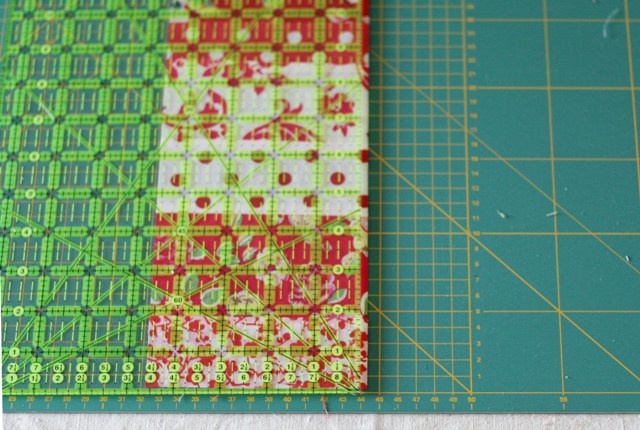
3. Square it up. Repeat the piecing, pressing and squaring up 3 times. You’ll end up with 4 pieced rectangles, each of them measuring approx. 45 x 12 cm.

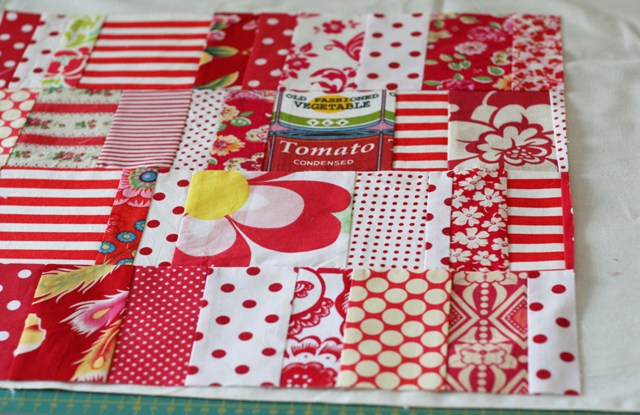
4. Arrange the strips in a pleasing way and sew them together. Press.

5. Square it up. This is the carrier bag store’s outer fabric.
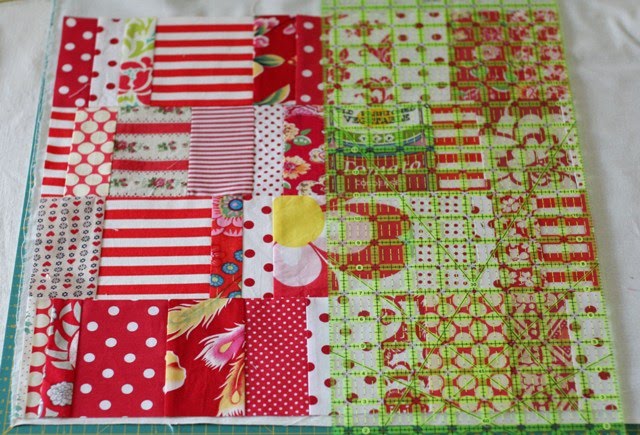
6. Place the pieced fabric on top of your muslin and cut along the sides. You’ll get a piece of muslin that has the exact same mesurements as the pieced fabric. The muslin is the inside (lining) of the carrier bag store.

7. Pin in place.
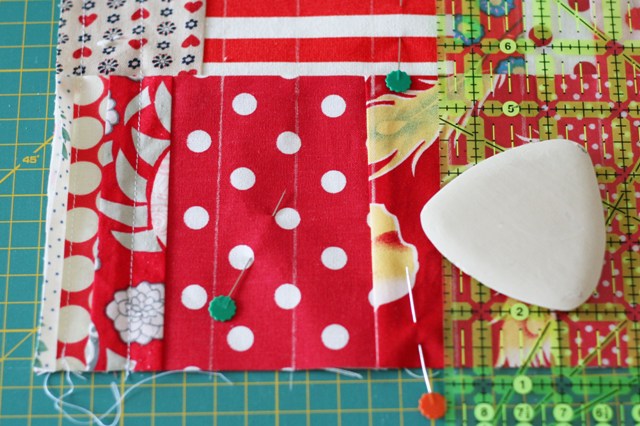
8. Trace lines for quilting with tailor’s chalk. I traced mine 2,5 cm apart.

9. Quilt it.

10. Zig-zag all around the rectangle.

11. Get one lenght of elastic. Fold and press one raw edge (wrong sides together), approx. 1,7 cm.

12. Sew in 0,5 cm from raw edge.
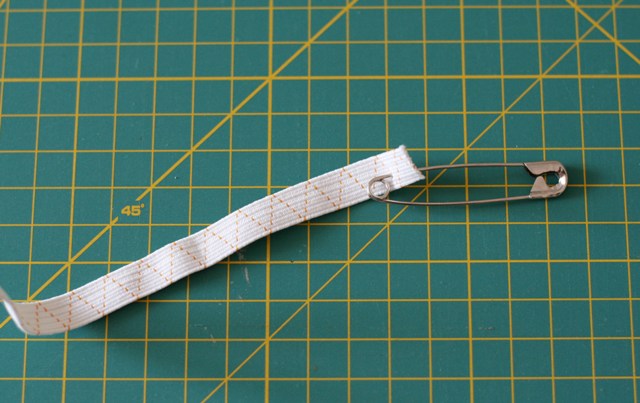

13. Attach a safety pin to one end of elastic and insert it into the tube you just made. Stitch the other end of elastic (the one that has no safety pin) to the end of the tube. This will prevent the elastic from “escaping”.
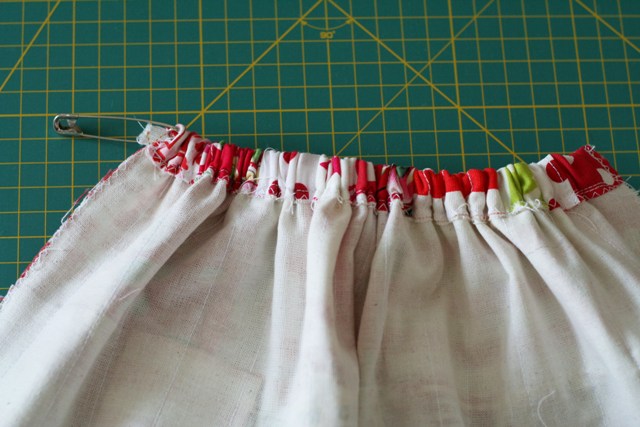
14. Push and pull the elastic through. Distribute the fabric equally throughout the elastic. Get rid of the safety pin and stitch the other end of the tube, making sure you enclose the elastic. Repeat with the other raw end.
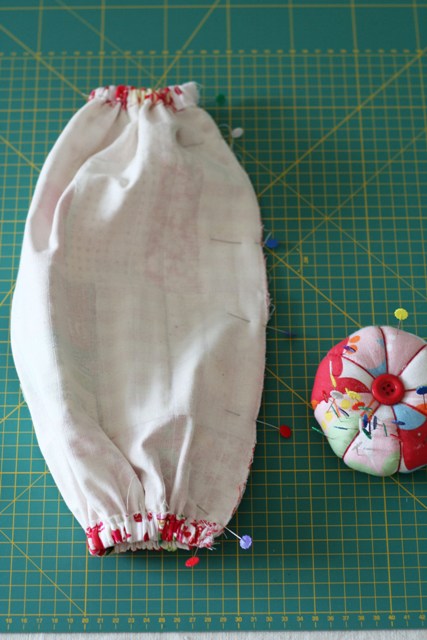
15. Turn the pieced sides together (lining facing up), pin in place and sew. Turn it inside out.

16. Take the 50 x 6 cm rectangle for loop, sew right sides together (along the lenght)and turn it inside out. Press. Now pin the loop in place and sew. Stuff the top with those nasty plastic bags and pull them out of the bottom. You’re done!
(images: Constança Cabral)

Muito giro o tutorial!
E útil! Pois dá muito geito ter onde armazenar os saquinhos.
E muito bem explicado com imagens!
Obrigada!
LikeLike
Ficou muito giro! Adoro as cores!
Cá em casa eu chamo-lhe de “puxa saco” 🙂 já que veio connosco do Brasil.
Lena
LikeLike
This is such a fun project! I love it lots and adore your selection of fabrics! Thank you soo much for such a cute tutorial! Have a lovely merry happy day and love to you!
LikeLike
Adorei, e para venda estão disponíveis?
Amélia
LikeLike
Uma ideia muito original! 🙂 fico a torcer para que ganhes o passatempo 🙂
LikeLike
boa !
LikeLike
great tutorial!!!! thanks for sharing, i love the fabrics you used!
LikeLike
I'm with Rosa Maria on this one – nice fabric, love the combo of reds! And super nice tutorial, you make it look real easy 😉
LikeLike
Please keep on blogging more tutorials! Things are getting more easier to see them step by step.
LikeLike
Love all your fabrics! Great tutorial and great blog!!
LikeLike
How beautiful! And how nice of you to share such a nice (and so necessary, with all these nasty plastic bags everywhere!) project!
Have a lovely day!
LikeLike
Espectacular… só queria ter jeito para estas coisas 🙂
LikeLike
Thanks so much for the tutorial! I love your addition of the soup can fabric, just the right touch!
LikeLike
I love this idea! Thanks for sharing your tutorial! I will be making one for me and some for Christmas presents!!!
LikeLike
Such a pretty bag holder, and such a great use for scraps!
I posted a link to your tutorial on Craft Gossip Sewing:
http://sewing.craftgossip.com/tutorial-scrappy-grocery-sack-holder/2009/10/08/
–Anne
LikeLike
Linked over from Sew Mama Sew. Really enjoyed your tutorial. Such a practical (and pretty) project. I love when I can use up scraps and come up with something useful! Thanks for sharing!
LikeLike
Olá Constança.
Muito obrigada pela explicação da execução do saco.
Preciso que me traduza o que utilizou para o enchimento, porque me pareceu uma óptima solução para “quiltar” à máquina, com uma máquina comum como a minha.
Parabéns pelo blog e pelo seu bonito trabalho.
Cristina
LikeLike
Cristina,
Para o forro usei pano cru.
Constança
LikeLike
Óptimo tutorial! Obrigada!
LikeLike
what a brilliant tutorial and lovely fabric – how cute is that square that says “tomato soup”!
LikeLike
Muito obrigada!
Bom fim de semana e bons projectos.
LikeLike
Muito lindo! E pelo tutorial parece tão fácil… Mas não consigo…
Adoro este blog!
LikeLike
I'm smitten! What a fantastic idea! I never thought of that before! Must start on it right away because I just can't stand the sight of those (unfortunately sometimes necessary) plastic bags. I certainly am looking forward to making this! Have a good day and Greetings from Germany!
LikeLike
I didn't piece mine together, but I used your tutorial as a guide to make two dispensers for storing plastic bags. Thanks for providing such a clear tutorial!
LikeLike
very beautiful
LikeLike
What a great tutorial! Thanks for sharing.
LikeLike
o meu primeiro trabalho de costura foi hoje com a sua ajuda concha! fiquei fã 🙂 a minha mãe ensinou-me a trabalhar com a máquina e lá fiz! adorei o tutorial! obrigado e quero outro!!!! beijinho
LikeLike
Neat! I'll have to try this, thanks for sharing! Greetings from the Faroe Islands!
LikeLike
Constança,
veio mesmo a calhar…
estou precisando fazer um cá pra casa….
e o seu ficou lindo,
além de muito bem explicado….
obrigada
abraços de MF
LikeLike
Constança, mais um trabalho genial e com a explicação passo a passo, ainda melhor. Vou aventurar-me a fazer um, sem dúvida. Só tenho de comprar a máquina (já agora, que tipo de máquina devo comprar?)
Obrigada por partilhar e continue a mostrar trabalhos com a explicação, pois é bem mais fácil.
Beijinho da cidade de Guimarães.
LikeLike
I featured this awesome tutorial on my blog today! http://www.thismemorablelife.blogspot.com
Thanks for sharing!
LikeLike
I’ll immediately clutch your rss as I can’t find your email subscription link or e-newsletter service. Do you have any? Kindly allow me realize so that I may subscribe. Thanks.
Mule poser
LikeLike
As being a Newbie, I am continuously browsing on the internet for content articles that may benefit me. Thank you
Printed Carrier Bags
LikeLike
So I suggest we start carrier bag wholesalers storing them in a neat, handy way!
LikeLike
I love these handbag holder! a minimum of a helpful accent. Christian Dior will an attractive one with Khabarovsk stones.. vet fashionable. I got mine from the London designers My Bag Hanger
LikeLike
Thanks to share these details it’s truly nice.httom/
LikeLike
I am first time learning something new and wonderful like making scrappy carrier bag. thanks Polyvisions Inc
LikeLike