
Why buy Christmas ornaments that look handmade when you can actually make them so easily? Sharon from The Key Bunch requested me for instructions on making Christmas ornaments so I’ve tried to document all the steps you need to take when making your personalised ornaments. So, this is not really a tutorial, but rather a bunch of suggestions written in an orderly manner. Shall we get to it?

1- First of all, you may want to look at some books, magazines, blogs and flickr photos for inspiration. Decide on shapes and look for patterns online. That’s right, I’m not going to provide you with any template, sorry! Just google ‘candy cane’, ‘Christmas stocking’, ‘gingerbread man’, ‘mitten’, ‘heart’ or — even better — draw your own shapes. Then assemble all your materials: various pairs of scissors, a pencil/pen, your glasses (optional), as many types and colours of thread as you wish, baker’s twine (if you own it), loads of buttons, fabric scraps, rick-rack, ribbon, pins and needles. You may notice that I’ve chosen a very limited colour palette because I believe that’s the key to success. But of course you can go wild and pick all the colours of the rainbow.
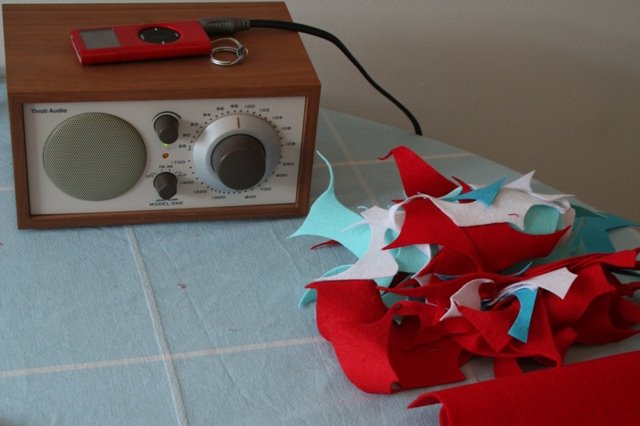
2- Gather all your felt scraps and turn your radio on!
–
–
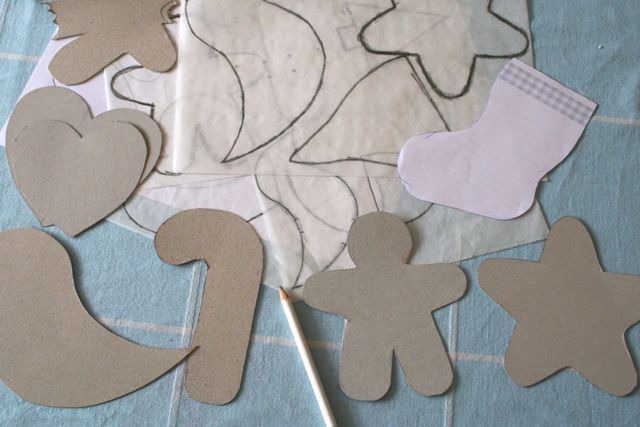
3- I decided I’d make my templates the old-fashioned way: first I printed them out and then traced over them using some tracing paper I found at the bottom of a drawer (I think I have these sheets since primary school). I then traced the shapes onto a cereal box for durability.

4- Trace all your shapes onto felt and cut them neatly. Always trace and cut in pairs because you’ll be stuffing the ornaments later.

5- Here they are all cut and ready to be embelished.

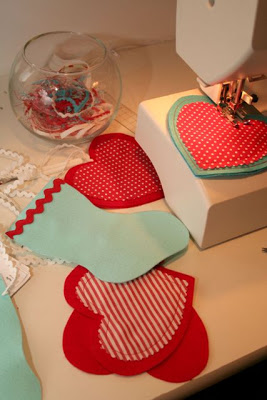

6- Now comes the fun part: play around with rick-rack, ribbon, buttons and scraps until you are happy with how it looks. Then sew everything onto your ornament piece. There are so many possibilities here that I had to choose and show you how to make only one type of ornament. That means that from now on you’ll watch how to finish this star; then at the end of this set you’ll see other examples of ornaments you can make.
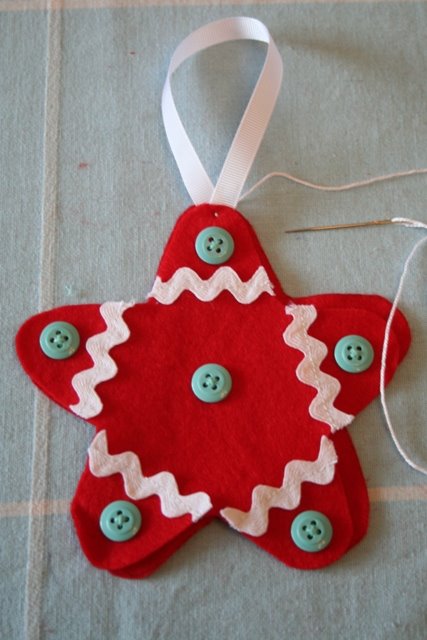
7- Let us get back to the star: make a loop (you’ll want to hang it on a tree branch, right?) and begin sewing the front and the back pannels together.
–
–

8- You can do it either by hand or machine and use different kinds of stiches. Here I sewed it by hand using the simplest stitch ever.

9- When you’re nearly finished, grab a bit of polyfill and stuff it through that little opening. You may want to use a chopstick or other pointy tool to get the stuffing in all the tiny and tricky places.
–

10- Close the opening. You’re done! 🙂
–
As I said, I’ll show you other examples of things you can make using this technique. Have fun and if you make something based on these instructions I’d love to see it!


نقل اثاث بالدمام
شركة كشف تسرب المياه بالرياض
شركة عزل خزانات بالرياض
شركة رش مبيدات بالدمام
شركة عزل خزانات بالدمام
شركة عزل اسطح بالدمام
شركة تخزين اثاث بالدمام
شركة عزل مائي بالرياض
شركة تخزين عفش بالرياض
شحن عفش داخل السعودية
شركة نقل اثاث مكة
شركة كشف تسربات المياه بالدمام
شركة تنظيف خزانات بجدة
شركات تنظيف فى جدة
LikeLike
The article posted was very informative and useful
thanks for sharing.
jaring futsal , jaring futsal murah , jual jaring futsal , toko jaring futsal , agen jaring futsal , jaring golf , jual jaring golf , jaring golf murah ,
jaring polynet , tangga darurat , jaring truk , jaring cargo , jaring outbound , jual rumput futsal murah , jual rumput sintetis murah ,
tali tambang , cargo net , jaring tanaman , jaring kassa , jaring proyek , jaring bangunan , jaring gedung , jaring pengaman proyek ,
jaring pengaman bangunan , jaring pengaman gedung , jaring peneduh , jaring waring , kasa hijau , tangga darurat , jaring gawang futsal , jual jaring gawang futsal murah , jaring peneduh , jaring truk , tali tambang nylon
LikeLike
كشف تسربات المياه
نقل اثاث بالرياض
تخزين اثاث بالرياض
كشف تسربات المياه
عزل مائى بالرياض
ترميم منازل
كشف تسربات المياه
ترميم منازل بالرياض
تخزين اثاث بالرياض
كشف تسربات المياه
نقل اثاث بالرياض
تخزين اثاث بالرياض
تخزين اثاث بالرياض
تخزين اثاث بالرياض
كشف تسربات المياه
ترميم منازل بالرياض
كشف تسربات المياه
عزل مائى بالرياض
نقل اثاث بالرياض
تخزين اثاث بالرياض
ترميم منازل بالرياض
كشف تسربات المياه بالرياض
شركة عزل مائى بالرياض
نقل اثاث بالرياض
تخزين اثاث بالرياض
تخزين عفش بالرياض
رش مبيدات بالرياض
مكافحة الحشرات بالرياض
نقل اثاث بالرياض
ترميم منازل فى الرياض
عزل مائى وحرارى بالرياض
كشف تسربات المياه بالرياض
كشف تسربات المياه
كشف تسربات المياه
—–
LikeLike
Hello! I just want to offer you a huge thumbs up for the excellent info you have right here on this post. I'll be returning to your blog for more soon.
Cheers,
http://www.prokr.com/blog/
http://www.albyaan.com/
http://www.elbassma.net/
http://www.prokr.com/furniture-moving-company-riyadh/
http://www.prokr.com/cleaning-company-riyadh/
http://www.prokr.com/water-leaks-detection-isolate-company-riyadh/
LikeLike
شركة نقل اثاث بالدمام
برامج محاسبيه
برنامج مقاولات
برامج محاسبيه
برنامج شركات المقاولات
نقل اثاث بالدمام
برنامج محاسبة مقاولات
برنامج محاسبة مقاولات
برنامج مقاولات
مدير تسويق شركة بابل للبرمجيات
شركة غسيل خزانات بالدمام
شركة مكافحة حشرات بالدمام
شركة نظافه بالدمام
شركة تنظيف منازل بالدمام
شركة غسيل خزانات بالدمام
شركة تنظيف منازل بالمدينه المنوره
شركة مكافحة حشرات بالمدينه المنوره
شركة غسيل خزانات بالمدينه المنوره
شركة نقل اثاث بالمدينه المنوره
شركة تنظيف منازل بالمدينه المنوره
شركة مكافحة حشرات بالمدينه المنوره
شركة غسيل خزانات بالمدينه المنوره
شركة نقل اثاث بالمدينه المنوره
شركة نقل اثاث بالمدينه المنوره
شركة مكافحة حشرات بالمدينه المنوره
شركة نظافه عامه بالمدينه المنوره
LikeLike
شركة الصفرات للتنظيف
شركة الصفرات لنقل العفش بالرياض
LikeLike
شركة كشف تسربات المياه بالرياض
كشف تسربات المياه
شركة كشف تسربات بالرياض
شركة تنظيف بالرياض
شركة تنظيف منازل بالرياض
ِشركة تنظيف شقق بالرياض
ِشركة تنظيف خزانات بالرياض
ِشركة تنظيف مسابح بالرياض
ِشركة تنظيف كنب بالرياض
شركة ابادة الحشرات بالرياض
شركة مكافحة الصراصير بالرياض
شركة مكافحة الفئران بالرياض
شركة مكافحة البق بالرياض
شركة نقل اثاث بالرياض
شركة نقل عفش بالرياض
نقل اثاث
شركة تنظيف كنب بالدمام
شركة تنظيف كنب بالخبر
شركة تنظيف بالدمام
شركة نظافة بالدمام
LikeLike
very nice post
http://www.tanzeef-jeddah.com/2015/07/tanzeef-manazel.html
http://www.tanzeef-jeddah.com/2015/07/tanzeef-seggaad.html
http://www.tanzeef-jeddah.com/2015/07/tanzeef-khaznat.html
http://www.tanzeef-jeddah.com/2015/07/nazafah-jiddah.html
http://www.naql3afsh.com/2015/06/naql-3afsh5.html
http://www.naql3afsh.com/2015/05/naql-3afsh1.html
http://www.mokaf7et-7shrat.com/2015/07/m-7shrat-jeddah.html
http://www.mokaf7et-7shrat.com/2015/07/rash-elbaqq.html
http://www.mokaf7et-7shrat.com/2015/07/rash-elnaml-elabiad.html
http://www.asass-most3mal.com/2015/07/asass-mosta3mal1.html
http://www.asass-most3mal.com/2015/07/bee3-asass.html
LikeLike
I know where I'm going and l know the truth, and I don't have to be what you want me to be. I'm free to be what I want.Thankyou i really love it.........
LikeLike
Thats a good' article,i usually amazed with' this thing, i asked myself about this opinion, I wish You'll a better articles that can make another people impressive..don't make the article feel rigit and isn't interesting and poor, i like to read this' article and i think this is “good”.thank you' m'y brother.......... .
LikeLike
Exceilent blog you have here but I was curious abou t if you knew of any communi ty forums tha t cover the same topics talked about in this article? I’d really like to be a part of online community where I can get advice from other experienced individuaIs that share the same interest. If you have any suggestions, please let me know. Appreciate it....
LikeLike
nice blog
كشف تسربات المياة بجدة
كشف تسربات بجدة
شركة عزل بجدة
شركات العزل بجدة
LikeLike
Oracle 11g RAC Online Training Institutue From Chennai
Oracle DBA Online Training Institutue From Chennai
Oracle SOA Online Training Institutue From Chennai
SalesForce Online Training Institutue From Chennai
SAP ABAP Online Training Institutue From Chennai
SAP Basis Online Training Institutue From Chennai
LikeLike
discount coupons for shopcj
discount coupons for shopclues
discount coupons for shoppersstop
discount coupons for slimthread
discount coupons for snapdeal
discount coupons for stalkbuylove
LikeLike
شركة تنظيف بالرياض
شركة تنظيف فلل بالرياض
شركة تنظيف شقق بالرياض
شركة تنظيف مجالس بالرياض
شركة تنظيف خزنات بالرياض
شركة مكافحة حشرات بالرياض
شركة تخزين اثاث بالرياض
شركة تسليك مجارى بالرياض
شركة رش مبيدات بالرياض
شركة نظافه بالرياض
LikeLike
nice blog
كشف تسربات المياة بجدة
كشف تسربات بجدة
كشف تسرب المياة بجدة
شركة عزل بجدة
LikeLike
nice post, thanks
شركة نقل عفش واثاث
نقل عفش
شركة نقل عفش بجدة
شركة نقل اثاث بمكة والطائف
شركة نقل عفش بالمدينة وينبع
شركة نقل اثاث بالدمام والجبيل
شركة نقل عفش بالرياض والقصيم
شركة نقل اثاث بخميس مشيط
شركة نقل عفش بتبوك وحائل
فك وتركيب العفش
LikeLike
Every weekend i used to go to see this site, for the reason that i wish for enjoyment,
since this this web page conations in fact pleasant funny stuff too.
Windows 8.1 Activator
ConceptDraw Pro 10 Removewat
LikeLike
WOW, amazing i love xmas and newyear…. hope your holiday is fun Tnks so much for article bisnis borneo
LikeLike
Microsoft Office 2013 Activator & Product key generator
Advanced SystemCare Pro 8 Kaspersky Internet Security 2016 Crack
Avast Premier 2015 10
SUPERAntiSpyware Pro v6 DriverPack Solution 15
Thee contents are masterpiece.
you’ve done a wonderful process in this matter!
LikeLike
good post
كشف تسربات المياه بالرياض
شركة كشف تسربات بالرياض
كشف تسرب المياه بالرياض
شركات العزل بالرياض
شركة عزل بالرياض
عزل الاسطح والخزانات بالرياض
تنظيف خزانات بالرياض
غسيل خزانات بالرياض
تسليك مجارى بالرياض
شفط بيارات بالرياض
LikeLike
I know where I'm going and I know the truth, and I don't have to be what you want me to be. I'm free to be what I want.Thankyou i really love it
sharelink
filehippo
2016 free download latest version
acehfreesoft
umarka
offlineinstallerfilehippo
esoftpedia
filehorse
supportcanon
freedownloadlatetsversion
LikeLike
I really like your blog.. very nice colors & theme.http://crackprofile.com/2015/10/22/glasswire-pro-1-1-7-serial-key-crackserial-number/
LikeLike